How to Plan a Route Using a Paper Map: Steps to Follow
Key Takeaways:
- Planning a route using a paper map is a reliable and rewarding skill.
- Learn the steps to plan your journey on a paper map effectively.
- Discover how to incorporate various tools and techniques to enhance your route planning.
Table of Contents:
- Introduction
- Gather Your Supplies
- Understand Map Symbols and Legends
- Identify Your Starting Point and Destination
- Plot Your Route
- Measure the Distance
- Consider Elevation Changes
- Mark Points of Interest
- Review and Adjust Your Route
- Conclusion
Introduction
In an age dominated by GPS and digital navigation tools, the skill of planning a route using a paper map remains invaluable. Whether embarking on a road trip, hiking adventure, or simply honing your orienteering abilities, paper maps offer a tangible and dependable way to navigate. Learning to plan a route on a paper map effectively can enhance your travels and ensure you’re prepared no matter where you go. The process might seem daunting at first, but you’ll find it rewarding and empowering with some practice.
Gather You
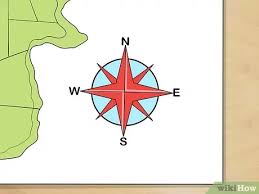
begin plotting your route, gather all necessary supplies. You’ll need a detailed paper map of the area you plan to explore. Maps like Thomas Guides are handy for their comprehensive road and terrain details. Additionally, have a pencil, ruler, highlighter, and compass on hand to assist in marking and measuring your route. These tools will help you make precise calculations and clear notations on your map, giving you a clear visual representation of your journey.
Make sure the map you choose is current and accurate. Outdated maps lack recent infrastructure changes, potentially leading to confusion. If possible, please complete your paper map with recent data from local government resources or park services. Keeping your supplies organized and accessible will make the route planning process smoother and more enjoyable.
Understand Map Symbols and Legends
Familiarizing yourself with the map symbols and legends is crucial to accurately interpreting the map. Most maps include a legend that explains symbols for roads, trails, parks, water bodies, and other landmarks. Understanding these symbols will allow you to navigate terrain effectively and identify critical features along your route. Take some time to study the legend before planning your journey, as this foundational knowledge will be integral to your success.
Beyond the basic symbols, get acquainted with any specific notations or scales unique to your map. For example, some maps may indicate different types of terrain, vegetation, or artificial structures. Being well-versed in these details can help you anticipate obstacles and plan for contingencies. This preparation will ensure you are well-equipped to handle any surprises along your route.
Identify Your Starting Point and Destination
The next step is identifying your starting point and destination on the map. Mark these locations with circles or distinct symbols for easy reference. Ensuring you have correctly identified these points will serve as the foundation for plotting your route. Pay close attention to surrounding landmarks and features to avoid confusion later. If your route includes multiple destinations or stopovers, mark those to create a comprehensive travel plan.
If you’re exploring a large area, it might be helpful to section off your map into manageable segments. This approach allows you to focus on smaller areas one at a time, reducing the chances of errors and making the process less overwhelming. Having a clear starting point and destination will also enable you to communicate your plans effectively to others who might be joining you on your journey.
Plot Your Route
You can begin plotting your route with your starting point and destination marked. Draw a line connecting your starting point to your destination using a pencil and ruler. Consider the available roadways, trails, and paths. Aim for the most direct route while factoring in safety and convenience. Avoid excessive detours that could complicate your journey. It’s essential to stay flexible, as real-world conditions might necessitate adjustments to your planned route. Take into account the type of travel you are undertaking.
Measure the Distance
Once you have plotted your initial route, it’s time to measure the distance. Use the map’s scale to determine the length of your journey. Many maps include a scale bar that indicates the equivalent distance in miles or kilometers. By measuring your plotted route against the scale, you can accurately calculate the total distance you’ll travel. This information will be vital for estimating travel time and resource needs, such as fuel, water, or food.
For outdoor adventures, consider segmenting your route into daily travel distances. This method lets you plan rest stops and overnight stays, ensuring you maintain a sustainable pace.
Consider Elevation Changes
Elevation changes can significantly impact your journey, especially if you’re hiking or biking. Look for contour lines on your map that indicate elevation changes. Steep inclines or declines can affect your pace and energy levels. Take note of these changes and adjust your route if necessary to avoid overly strenuous sections. Planning for elevation changes will help ensure a more enjoyable and manageable journey.
Elevation profiles can be handy in mountainous or hilly areas. These profiles provide a side view of the terrain, showing the ups and downs you’ll encounter along your route.
Mark Points of Interest
Enhance your travel experience by marking points of interest along your route. These could include scenic viewpoints, rest stops, restaurants, or historical sites. Highlight these locations on your map with different colors or symbols. Having points of interest marked will provide reference points and add excitement to your journey. Additionally, it can help break up long stretches of travel and offer opportunities for rest and exploration.
Researching points of interest ahead of time can also provide valuable insights into the areas you’ll be passing through. Local tourism websites, travel blogs, and guidebooks are excellent resources for discovering hidden gems and popular attractions.
Review and Adjust Your Route
Before finalizing your route:
- Take some time to review it thoroughly.
- Check for potential road closures, rugged terrain, or restricted areas.
- Compare your route with alternative paths to ensure you’ve chosen the best option.
- Make any necessary adjustments to improve safety, efficiency, or enjoyment.
Reviewing and refining your route will increase your confidence and preparedness.
Conclusion
Planning a route using a paper map is a valuable skill that combines practicality and adventure. You can navigate effectively and confidently by gathering the right supplies, understanding map symbols, and carefully plotting your path. Measuring distance, considering elevation changes, and marking points of interest further enhance your journey. Taking the time to review and adjust your route ensures a successful and enjoyable experience. Embrace the joy and reliability of paper map navigation on your next adventure! The tactile interaction with a physical map and the satisfaction of mastering this skill makes it a profoundly gratifying way to explore the world.
Keep an eye for more news & updates on GlamourUer.Com!